Restauro do meu Mercedes 220b de 1961(rabo de peixe)

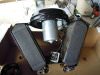
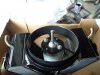
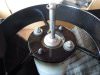
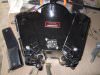
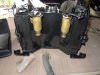
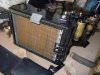
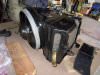
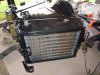
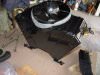
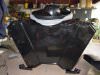
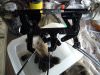
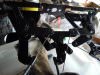
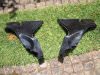
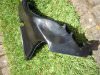
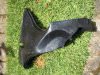
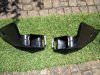
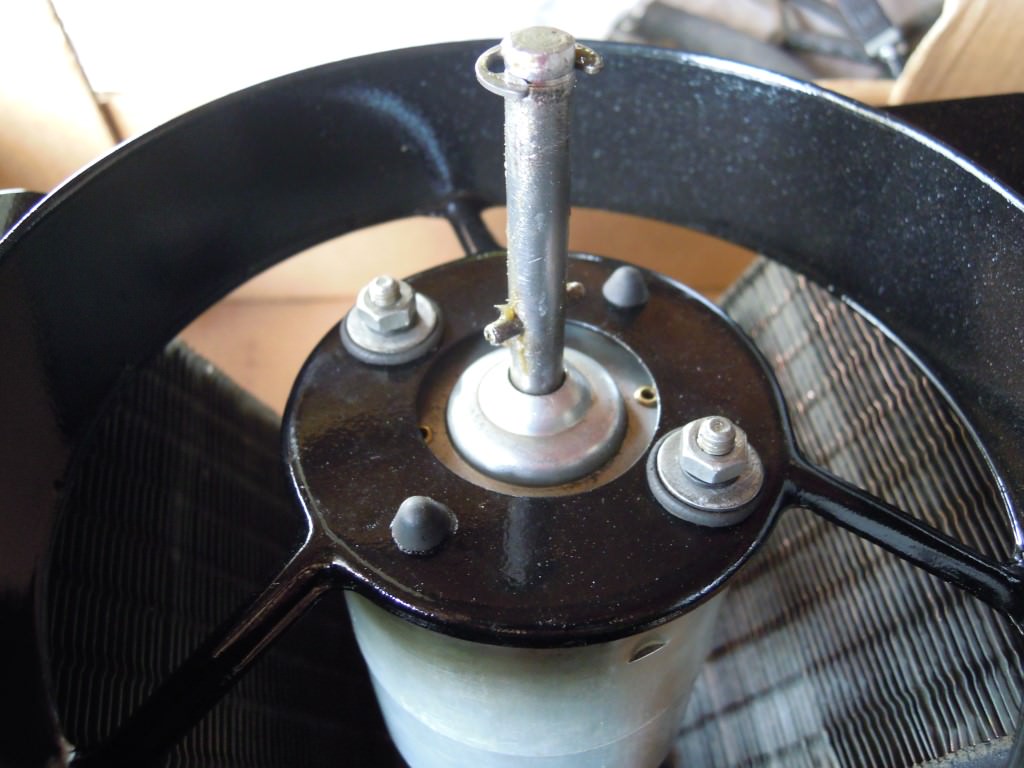
E lá continuamos a montar a sofagem. Também lavamos as condutas de ar em plástico. O veio do motor foi lubrificado para não voltar a acontecer o azar de não querer sair, porque ganhou ferrugem.
 

Anexos

  • DSCN6418.JPG
    DSCN6418.JPG
    193.8 KB · Vistos: 10
  • DSCN6419.JPG
    DSCN6419.JPG
    169.2 KB · Vistos: 13
  • DSCN6420.JPG
    DSCN6420.JPG
    157.7 KB · Vistos: 11
  • DSCN6421.JPG
    DSCN6421.JPG
    190.7 KB · Vistos: 11
  • DSCN6422.JPG
    DSCN6422.JPG
    178.8 KB · Vistos: 12
  • DSCN6423.JPG
    DSCN6423.JPG
    221 KB · Vistos: 12
  • DSCN6424.JPG
    DSCN6424.JPG
    189.9 KB · Vistos: 11
  • DSCN6425.JPG
    DSCN6425.JPG
    227.5 KB · Vistos: 13
  • DSCN6426.JPG
    DSCN6426.JPG
    174 KB · Vistos: 11
  • DSCN6427.JPG
    DSCN6427.JPG
    174 KB · Vistos: 14
  • DSCN6428.JPG
    DSCN6428.JPG
    174.9 KB · Vistos: 13
  • DSCN6429.JPG
    DSCN6429.JPG
    152.5 KB · Vistos: 13
  • DSCN6430.JPG
    DSCN6430.JPG
    385.7 KB · Vistos: 14
  • DSCN6431.JPG
    DSCN6431.JPG
    323.6 KB · Vistos: 13
  • DSCN6432.JPG
    DSCN6432.JPG
    373.1 KB · Vistos: 11
  • DSCN6433.JPG
    DSCN6433.JPG
    375.1 KB · Vistos: 11
  • DSCN6434.JPG
    DSCN6434.JPG
    409.4 KB · Vistos: 10
Pegamos nos pára-choques da frente, para fazer uma pequena limpeza e ver o estado de conservação mais em pormenor. Limpei-os no interior e apliquei um passivador de ferrugem, daí a cor cinza azulada.
São para-choques que comprei no e-bay porque os meus estavam em mau estado, mesmo depois de terem sido consertados. Não ficaram em condições porque a chapa já tinha sido mexida antes e estava com a espessura fina. Ao soldar aparecia sempre um novo estalado.
Comecei a desmontar os bancos da frente para ver o estado interior e os ferros vão ter de ser limpos com jacto de areia.
 

Anexos

  • DSCN6435.JPG
    DSCN6435.JPG
    159.9 KB · Vistos: 8
  • DSCN6436.JPG
    DSCN6436.JPG
    138.3 KB · Vistos: 9
  • DSCN6437.JPG
    DSCN6437.JPG
    146.3 KB · Vistos: 8
  • DSCN6438.JPG
    DSCN6438.JPG
    137.2 KB · Vistos: 8
  • DSCN6439.JPG
    DSCN6439.JPG
    201.2 KB · Vistos: 7
  • DSCN6440.JPG
    DSCN6440.JPG
    184.6 KB · Vistos: 9
  • DSCN6441.JPG
    DSCN6441.JPG
    120.3 KB · Vistos: 8
  • DSCN6442.JPG
    DSCN6442.JPG
    148.5 KB · Vistos: 10
  • DSCN6443.JPG
    DSCN6443.JPG
    141.6 KB · Vistos: 8
  • DSCN6444.JPG
    DSCN6444.JPG
    136.8 KB · Vistos: 8
  • DSCN6445.JPG
    DSCN6445.JPG
    160.5 KB · Vistos: 9
  • DSCN6446.JPG
    DSCN6446.JPG
    108.9 KB · Vistos: 8
  • DSCN6447.JPG
    DSCN6447.JPG
    145.3 KB · Vistos: 8
  • DSCN6448.JPG
    DSCN6448.JPG
    120.6 KB · Vistos: 9
  • DSCN6449.JPG
    DSCN6449.JPG
    123.6 KB · Vistos: 9
  • DSCN6451.JPG
    DSCN6451.JPG
    157.3 KB · Vistos: 8
  • DSCN6452.JPG
    DSCN6452.JPG
    141.2 KB · Vistos: 8
  • DSCN6454.JPG
    DSCN6454.JPG
    125.1 KB · Vistos: 9
  • DSCN6455.JPG
    DSCN6455.JPG
    149.4 KB · Vistos: 7
  • DSCN6456.JPG
    DSCN6456.JPG
    159.6 KB · Vistos: 8
  • DSCN6457.JPG
    DSCN6457.JPG
    246.5 KB · Vistos: 7
  • DSCN6458.JPG
    DSCN6458.JPG
    169.8 KB · Vistos: 7
Continuamos a trabalhar nos bancos da frente. O estado geral até é razoável mas já optei por fazer um trabalho de fundo e decidi levar os ferros ao jacto de areia, porque existem vários focos de ferrugem.
 

Anexos

  • DSCN6459.JPG
    DSCN6459.JPG
    306.6 KB · Vistos: 4
  • DSCN6460.JPG
    DSCN6460.JPG
    236.8 KB · Vistos: 5
  • DSCN6461.JPG
    DSCN6461.JPG
    306.1 KB · Vistos: 4
  • DSCN6462.JPG
    DSCN6462.JPG
    192.7 KB · Vistos: 3
  • DSCN6463.JPG
    DSCN6463.JPG
    210 KB · Vistos: 3
  • DSCN6464.JPG
    DSCN6464.JPG
    249.8 KB · Vistos: 4
  • DSCN6465.JPG
    DSCN6465.JPG
    155.2 KB · Vistos: 4
  • DSCN6466.JPG
    DSCN6466.JPG
    260.3 KB · Vistos: 4
  • DSCN6467.JPG
    DSCN6467.JPG
    161.3 KB · Vistos: 6
  • DSCN6469.JPG
    DSCN6469.JPG
    179 KB · Vistos: 5
  • DSCN6470.JPG
    DSCN6470.JPG
    221.2 KB · Vistos: 5
  • DSCN6471.JPG
    DSCN6471.JPG
    143.6 KB · Vistos: 5
  • DSCN6472.JPG
    DSCN6472.JPG
    197.5 KB · Vistos: 4
  • DSCN6473.JPG
    DSCN6473.JPG
    233.6 KB · Vistos: 3
Pois é Paulo Jorge mas é precisamente o recuperar o melhor que posso e sei que me dá mais prazer, obrigado.
Estive a desmontar mais um banco da frente, mais precisamente uma das costas.
 

Anexos

  • DSCN6474.JPG
    DSCN6474.JPG
    238.4 KB · Vistos: 3
  • DSCN6475.JPG
    DSCN6475.JPG
    231.1 KB · Vistos: 2
  • DSCN6476.JPG
    DSCN6476.JPG
    178 KB · Vistos: 3
  • DSCN6477.JPG
    DSCN6477.JPG
    224 KB · Vistos: 3
  • DSCN6478.JPG
    DSCN6478.JPG
    160.6 KB · Vistos: 2
  • DSCN6479.JPG
    DSCN6479.JPG
    209.4 KB · Vistos: 2
  • DSCN6480.JPG
    DSCN6480.JPG
    172.2 KB · Vistos: 4
  • DSCN6481.JPG
    DSCN6481.JPG
    152.9 KB · Vistos: 3
  • DSCN6482.JPG
    DSCN6482.JPG
    202.9 KB · Vistos: 4
Ola Fábio, estou a pensar mandar estofar de novo, mas ainda não decidi, primeiro vou ver como estão a totalidade dos bancos e depois farei um orçamento.
Desmontamos as armações do banco, vou ter que recorrer ao jacto de areia, mais uma vez.
Um abraço,
 

Anexos

  • DSCN6483.JPG
    DSCN6483.JPG
    238.2 KB · Vistos: 2
  • DSCN6484.JPG
    DSCN6484.JPG
    142.8 KB · Vistos: 3
  • DSCN6485.JPG
    DSCN6485.JPG
    290.1 KB · Vistos: 2
  • DSCN6486.JPG
    DSCN6486.JPG
    286.4 KB · Vistos: 4
  • DSCN6487.JPG
    DSCN6487.JPG
    281.6 KB · Vistos: 2
  • DSCN6488.JPG
    DSCN6488.JPG
    276.3 KB · Vistos: 2
Espero em breve ver a máquina por Ponte de Lima ... laugh.png

Cumpts,
 

Anexos

  • laugh.png
    laugh.png
    989 bytes · Vistos: 0
  • laugh.png
    laugh.png
    989 bytes · Vistos: 5
  • laugh.png
    laugh.png
    989 bytes · Vistos: 0
  • laugh.png
    laugh.png
    989 bytes · Vistos: 0
Coube agora a vez ao segundo banco da frente ser desmontado. Temos mais do mesmo, alguns focos de ferrugem instalados, nada que não possa ser remediado. A este banco está acoplado o apoio dos braços.
 

Anexos

  • DSCN6489.JPG
    DSCN6489.JPG
    155.8 KB · Vistos: 1
  • DSCN6490.JPG
    DSCN6490.JPG
    158.9 KB · Vistos: 1
  • DSCN6491.JPG
    DSCN6491.JPG
    134.2 KB · Vistos: 1
  • DSCN6492.JPG
    DSCN6492.JPG
    151.7 KB · Vistos: 1
  • DSCN6493.JPG
    DSCN6493.JPG
    138.7 KB · Vistos: 2
  • DSCN6494.JPG
    DSCN6494.JPG
    142.7 KB · Vistos: 3
  • DSCN6495.JPG
    DSCN6495.JPG
    143.5 KB · Vistos: 1
  • DSCN6496.JPG
    DSCN6496.JPG
    101.4 KB · Vistos: 1
  • DSCN6497.JPG
    DSCN6497.JPG
    183 KB · Vistos: 1
  • DSCN6498.JPG
    DSCN6498.JPG
    173.2 KB · Vistos: 2
  • DSCN6500.JPG
    DSCN6500.JPG
    157.6 KB · Vistos: 2
  • DSCN6501.JPG
    DSCN6501.JPG
    144 KB · Vistos: 1
  • DSCN6502.JPG
    DSCN6502.JPG
    164.5 KB · Vistos: 1
  • DSCN6503.JPG
    DSCN6503.JPG
    149.7 KB · Vistos: 2
  • DSCN6504.JPG
    DSCN6504.JPG
    170 KB · Vistos: 1
  • DSCN6505.JPG
    DSCN6505.JPG
    165.7 KB · Vistos: 1
  • DSCN6507.JPG
    DSCN6507.JPG
    216 KB · Vistos: 2
  • DSCN6508.JPG
    DSCN6508.JPG
    209.3 KB · Vistos: 2
  • DSCN6509.JPG
    DSCN6509.JPG
    176.6 KB · Vistos: 1
  • DSCN6510.JPG
    DSCN6510.JPG
    133.3 KB · Vistos: 1
  • DSCN6511.JPG
    DSCN6511.JPG
    217.4 KB · Vistos: 1
  • DSCN6512.JPG
    DSCN6512.JPG
    198.5 KB · Vistos: 2
  • DSCN6513.JPG
    DSCN6513.JPG
    190.7 KB · Vistos: 1
As borrachas de isolamento da sofagem estavam velhas e estragadas e estudei a maneira de as substituir com uma borracha esponjosa. Tive de lhes fazer um corte para encaixarem na chapa quinada.
Depois segui para as instalações da Granifinas a fim de decapar as estruturas metálicas dos bancos com jacto de areia.
Não há dúvida que vale a pena o trabalho qu se tem.
 

Anexos

  • DSCN6514.JPG
    DSCN6514.JPG
    173.1 KB · Vistos: 7
  • DSCN6515.JPG
    DSCN6515.JPG
    180.6 KB · Vistos: 7
  • DSCN6516.JPG
    DSCN6516.JPG
    193 KB · Vistos: 6
  • DSCN6517.JPG
    DSCN6517.JPG
    184.7 KB · Vistos: 8
  • DSCN6519.JPG
    DSCN6519.JPG
    199 KB · Vistos: 7
  • DSCN6520.JPG
    DSCN6520.JPG
    196.7 KB · Vistos: 8
  • DSCN6521.JPG
    DSCN6521.JPG
    156.7 KB · Vistos: 7
  • DSCN6523.JPG
    DSCN6523.JPG
    252 KB · Vistos: 7
  • DSCN6524.JPG
    DSCN6524.JPG
    221.4 KB · Vistos: 6
  • DSCN6525.JPG
    DSCN6525.JPG
    199.6 KB · Vistos: 6
  • DSCN6526.JPG
    DSCN6526.JPG
    226.2 KB · Vistos: 5
  • DSCN6527.JPG
    DSCN6527.JPG
    214 KB · Vistos: 7
  • DSCN6528.JPG
    DSCN6528.JPG
    233.9 KB · Vistos: 5
  • DSCN6529.JPG
    DSCN6529.JPG
    290 KB · Vistos: 6
  • DSCN6530.JPG
    DSCN6530.JPG
    278 KB · Vistos: 5
  • DSCN6531.JPG
    DSCN6531.JPG
    335.1 KB · Vistos: 5
  • DSCN6532.JPG
    DSCN6532.JPG
    246 KB · Vistos: 7
  • DSCN6533.JPG
    DSCN6533.JPG
    345.3 KB · Vistos: 6
  • DSCN6534.JPG
    DSCN6534.JPG
    239.9 KB · Vistos: 7
  • DSCN6535.JPG
    DSCN6535.JPG
    194.5 KB · Vistos: 7
  • DSCN6536.JPG
    DSCN6536.JPG
    304.8 KB · Vistos: 7
  • DSCN6537.JPG
    DSCN6537.JPG
    245.7 KB · Vistos: 5
  • DSCN6538.JPG
    DSCN6538.JPG
    237.1 KB · Vistos: 5
  • DSCN6539.JPG
    DSCN6539.JPG
    228.9 KB · Vistos: 4
Maravilha! Está tudo a ficar como novo! ohmy.png wink.png
 

Anexos

  • ohmy.png
    ohmy.png
    1 KB · Vistos: 0
  • wink.png
    wink.png
    1 KB · Vistos: 0
  • ohmy.png
    ohmy.png
    1 KB · Vistos: 5
  • wink.png
    wink.png
    1 KB · Vistos: 0
  • wink.png
    wink.png
    1 KB · Vistos: 0
  • wink.png
    wink.png
    1 KB · Vistos: 5
  • ohmy.png
    ohmy.png
    1 KB · Vistos: 0
  • ohmy.png
    ohmy.png
    1 KB · Vistos: 0

Anexos

  • wink.png
    wink.png
    1 KB · Vistos: 5
  • wink.png
    wink.png
    1 KB · Vistos: 1
  • cool.png
    cool.png
    1 KB · Vistos: 1
  • cool.png
    cool.png
    1 KB · Vistos: 1
  • wink.png
    wink.png
    1 KB · Vistos: 1
  • cool.png
    cool.png
    1 KB · Vistos: 5
  • wink.png
    wink.png
    1 KB · Vistos: 1
  • ohmy.png
    ohmy.png
    1 KB · Vistos: 1
  • ohmy.png
    ohmy.png
    1 KB · Vistos: 5
  • ohmy.png
    ohmy.png
    1 KB · Vistos: 1
  • ohmy.png
    ohmy.png
    1 KB · Vistos: 1
  • cool.png
    cool.png
    1 KB · Vistos: 1
Procedemos à pintura com primário epoxy das peças recentemente tratadas com o jacto de areia. Desta vez, como o preto tinha acabado, utilizamos um cinzento claro, mas do mesmo género, assim até é melhor para depois aplicar o preto chássis.
 

Anexos

  • DSCN6540.JPG
    DSCN6540.JPG
    157 KB · Vistos: 1
  • DSCN6541.JPG
    DSCN6541.JPG
    103.3 KB · Vistos: 1
  • DSCN6542.JPG
    DSCN6542.JPG
    244.9 KB · Vistos: 1
  • DSCN6543.JPG
    DSCN6543.JPG
    243 KB · Vistos: 4
  • DSCN6544.JPG
    DSCN6544.JPG
    99.9 KB · Vistos: 3
  • DSCN6545.JPG
    DSCN6545.JPG
    148 KB · Vistos: 2
  • DSCN6546.JPG
    DSCN6546.JPG
    139 KB · Vistos: 3
  • DSCN6547.JPG
    DSCN6547.JPG
    263 KB · Vistos: 1
  • DSCN6548.JPG
    DSCN6548.JPG
    217.4 KB · Vistos: 3
  • DSCN6549.JPG
    DSCN6549.JPG
    113.8 KB · Vistos: 2
  • DSCN6550.JPG
    DSCN6550.JPG
    79.7 KB · Vistos: 3
  • DSCN6551.JPG
    DSCN6551.JPG
    182.7 KB · Vistos: 1
Lixamos o primário com lixa fina 500 e pintamos os bancos com preto chássis resistente.
Na última foto a pintura ficou estragada porque se lhe colou um pouco de jornal que tinha a proteger a mesa de pintura.
 

Anexos

  • DSCN6558.JPG
    DSCN6558.JPG
    208.6 KB · Vistos: 6
  • DSCN6559.JPG
    DSCN6559.JPG
    204.4 KB · Vistos: 7
  • DSCN6560.JPG
    DSCN6560.JPG
    221.3 KB · Vistos: 6
  • DSCN6561.JPG
    DSCN6561.JPG
    277.1 KB · Vistos: 6
  • DSCN6562.JPG
    DSCN6562.JPG
    219.5 KB · Vistos: 7
  • DSCN6563.JPG
    DSCN6563.JPG
    215.6 KB · Vistos: 5
  • DSCN6564.JPG
    DSCN6564.JPG
    229.9 KB · Vistos: 5
  • DSCN6565.JPG
    DSCN6565.JPG
    245.4 KB · Vistos: 5
  • DSCN6566.JPG
    DSCN6566.JPG
    236.8 KB · Vistos: 5
Está muito bom... Bons trabalhos, mas o tempo não tem ajudado nada... pelo menos a mim tira me a vontade toda de mecanica..
 
Voltar
Topo