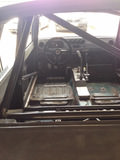
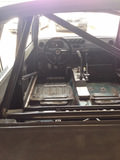
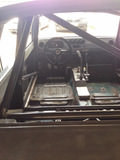
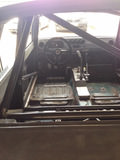
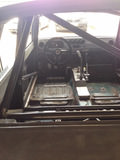
Ford Cortina Mk1 - Track Car

Anexos

  • image.jpg
    image.jpg
    92.2 KB · Vistos: 17
  • image.jpg
    image.jpg
    87.8 KB · Vistos: 16
  • image.jpg
    image.jpg
    97.4 KB · Vistos: 17
  • image.jpg
    image.jpg
    89.7 KB · Vistos: 17
  • image.jpg
    image.jpg
    75.3 KB · Vistos: 16
  • image.jpg
    image.jpg
    83.5 KB · Vistos: 16
  • image.jpg
    image.jpg
    82.3 KB · Vistos: 14
Armando Fonseca disse:
Ficou muito porreiro com o termostato de oleo a acompanhar e tudo ... laugh.png

Abraço
Armando isso é que é um olho de falcão para conseguir ver o termostato... laugh.png

A razão é que parece que o Zetec é um motor que "gosta" de trabalhar a quente com o óleo nos 90-100 graus por isso pareceu-me que seria aconselhável colocar o termostato apesar do mesmo estar regulado para os 80 graus (não encontrei nenhum a 90 graus).
 

Anexos

  • laugh.png
    laugh.png
    989 bytes · Vistos: 0
  • laugh.png
    laugh.png
    989 bytes · Vistos: 0
  • laugh.png
    laugh.png
    989 bytes · Vistos: 0
  • laugh.png
    laugh.png
    989 bytes · Vistos: 0
  • laugh.png
    laugh.png
    989 bytes · Vistos: 0
  • laugh.png
    laugh.png
    989 bytes · Vistos: 0
  • laugh.png
    laugh.png
    989 bytes · Vistos: 0
  • laugh.png
    laugh.png
    989 bytes · Vistos: 0
  • laugh.png
    laugh.png
    989 bytes · Vistos: 7
  • laugh.png
    laugh.png
    989 bytes · Vistos: 0
João Carlos Cruz disse:
Armando isso é que é um olho de falcão para conseguir ver o termostato... laugh.png

A razão é que parece que o Zetec é um motor que "gosta" de trabalhar a quente com o óleo nos 90-100 graus por isso pareceu-me que seria aconselhável colocar o termostato apesar do mesmo estar regulado para os 80 graus (não encontrei nenhum a 90 graus).
biggrin.png biggrin.png dei com ele por causa do suporte ... biggrin.png biggrin.png
 

Anexos

  • laugh.png
    laugh.png
    989 bytes · Vistos: 0
  • biggrin.png
    biggrin.png
    973 bytes · Vistos: 0
  • biggrin.png
    biggrin.png
    973 bytes · Vistos: 0
  • biggrin.png
    biggrin.png
    973 bytes · Vistos: 0
  • biggrin.png
    biggrin.png
    973 bytes · Vistos: 0
  • biggrin.png
    biggrin.png
    973 bytes · Vistos: 0
  • biggrin.png
    biggrin.png
    973 bytes · Vistos: 0
  • laugh.png
    laugh.png
    989 bytes · Vistos: 7
  • biggrin.png
    biggrin.png
    973 bytes · Vistos: 0
  • biggrin.png
    biggrin.png
    973 bytes · Vistos: 0
  • laugh.png
    laugh.png
    989 bytes · Vistos: 0
  • laugh.png
    laugh.png
    989 bytes · Vistos: 0
  • laugh.png
    laugh.png
    989 bytes · Vistos: 0
  • biggrin.png
    biggrin.png
    973 bytes · Vistos: 0
  • biggrin.png
    biggrin.png
    973 bytes · Vistos: 0
  • biggrin.png
    biggrin.png
    973 bytes · Vistos: 0
  • biggrin.png
    biggrin.png
    973 bytes · Vistos: 7
  • biggrin.png
    biggrin.png
    973 bytes · Vistos: 0
  • biggrin.png
    biggrin.png
    973 bytes · Vistos: 0
  • biggrin.png
    biggrin.png
    973 bytes · Vistos: 0
  • biggrin.png
    biggrin.png
    973 bytes · Vistos: 0
  • biggrin.png
    biggrin.png
    973 bytes · Vistos: 0
  • biggrin.png
    biggrin.png
    973 bytes · Vistos: 0
  • biggrin.png
    biggrin.png
    973 bytes · Vistos: 0
  • biggrin.png
    biggrin.png
    973 bytes · Vistos: 0
Mais uma peça do quebra cabeças e mais uma oportunidade para a fabricação do Mestre Branco brilhar biggrin.png biggrin.png biggrin.png o apoio do eixo e ao fundo pode-se ver a travessa já com o corte para o escape:


001bbbbbb.JPG

002bbbbbb.JPG
 

Anexos

  • biggrin.png
    biggrin.png
    973 bytes · Vistos: 0
  • biggrin.png
    biggrin.png
    973 bytes · Vistos: 0
  • biggrin.png
    biggrin.png
    973 bytes · Vistos: 0
  • biggrin.png
    biggrin.png
    973 bytes · Vistos: 0
  • biggrin.png
    biggrin.png
    973 bytes · Vistos: 0
  • biggrin.png
    biggrin.png
    973 bytes · Vistos: 0
  • biggrin.png
    biggrin.png
    973 bytes · Vistos: 0
  • biggrin.png
    biggrin.png
    973 bytes · Vistos: 0
  • biggrin.png
    biggrin.png
    973 bytes · Vistos: 7
  • biggrin.png
    biggrin.png
    973 bytes · Vistos: 0
  • biggrin.png
    biggrin.png
    973 bytes · Vistos: 0
  • biggrin.png
    biggrin.png
    973 bytes · Vistos: 0
  • biggrin.png
    biggrin.png
    973 bytes · Vistos: 0
  • biggrin.png
    biggrin.png
    973 bytes · Vistos: 0
  • 001bbbbbb.JPG
    001bbbbbb.JPG
    101.5 KB · Vistos: 0
  • 002bbbbbb.JPG
    002bbbbbb.JPG
    107.8 KB · Vistos: 0
  • 002bbbbbb.JPG
    002bbbbbb.JPG
    107.8 KB · Vistos: 7
  • 002bbbbbb.JPG
    002bbbbbb.JPG
    107.8 KB · Vistos: 0
  • 002bbbbbb.JPG
    002bbbbbb.JPG
    107.8 KB · Vistos: 0
  • 001bbbbbb.JPG
    001bbbbbb.JPG
    101.5 KB · Vistos: 7
  • 001bbbbbb.JPG
    001bbbbbb.JPG
    101.5 KB · Vistos: 0
  • biggrin.png
    biggrin.png
    973 bytes · Vistos: 0
  • 001bbbbbb.JPG
    001bbbbbb.JPG
    101.5 KB · Vistos: 0
  • 001bbbbbb.JPG
    001bbbbbb.JPG
    101.5 KB · Vistos: 0
  • 002bbbbbb.JPG
    002bbbbbb.JPG
    107.8 KB · Vistos: 0
E uma peça que deu bastante trabalho a encaixar no carro, o travão de mão...

FCB8E004-493A-44C4-96B4-8929A0226CB7.JPG

Mais uma vez o Mestre Branco teve a vida dificultada, o travão de mão teve de ser alterado para ser invertido e depois fabricado o suporte para o mesmo... tal como todas as coisas que são bem feitas depois de estarem no sitio parece que foram feitas para lá biggrin.png biggrin.png biggrin.png
 

Anexos

  • FCB8E004-493A-44C4-96B4-8929A0226CB7.JPG
    FCB8E004-493A-44C4-96B4-8929A0226CB7.JPG
    128.1 KB · Vistos: 0
  • FCB8E004-493A-44C4-96B4-8929A0226CB7.JPG
    FCB8E004-493A-44C4-96B4-8929A0226CB7.JPG
    128.1 KB · Vistos: 0
  • FCB8E004-493A-44C4-96B4-8929A0226CB7.JPG
    FCB8E004-493A-44C4-96B4-8929A0226CB7.JPG
    128.1 KB · Vistos: 0
  • biggrin.png
    biggrin.png
    973 bytes · Vistos: 0
  • biggrin.png
    biggrin.png
    973 bytes · Vistos: 0
  • biggrin.png
    biggrin.png
    973 bytes · Vistos: 0
  • biggrin.png
    biggrin.png
    973 bytes · Vistos: 0
  • biggrin.png
    biggrin.png
    973 bytes · Vistos: 0
  • biggrin.png
    biggrin.png
    973 bytes · Vistos: 0
  • biggrin.png
    biggrin.png
    973 bytes · Vistos: 0
  • biggrin.png
    biggrin.png
    973 bytes · Vistos: 0
  • biggrin.png
    biggrin.png
    973 bytes · Vistos: 0
  • FCB8E004-493A-44C4-96B4-8929A0226CB7.JPG
    FCB8E004-493A-44C4-96B4-8929A0226CB7.JPG
    128.1 KB · Vistos: 7
  • FCB8E004-493A-44C4-96B4-8929A0226CB7.JPG
    FCB8E004-493A-44C4-96B4-8929A0226CB7.JPG
    128.1 KB · Vistos: 0
  • biggrin.png
    biggrin.png
    973 bytes · Vistos: 0
  • biggrin.png
    biggrin.png
    973 bytes · Vistos: 0
  • biggrin.png
    biggrin.png
    973 bytes · Vistos: 0
  • biggrin.png
    biggrin.png
    973 bytes · Vistos: 0
  • biggrin.png
    biggrin.png
    973 bytes · Vistos: 7
  • biggrin.png
    biggrin.png
    973 bytes · Vistos: 0
João Carlos Cruz disse:
Armando isso é que é um olho de falcão para conseguir ver o termostato... laugh.png

A razão é que parece que o Zetec é um motor que "gosta" de trabalhar a quente com o óleo nos 90-100 graus por isso pareceu-me que seria aconselhável colocar o termostato apesar do mesmo estar regulado para os 80 graus (não encontrei nenhum a 90 graus).
Para temperatura de óleo, acho os 80ºC muito baixo, mesmo os 90ºC...
 

Anexos

  • laugh.png
    laugh.png
    989 bytes · Vistos: 0
  • laugh.png
    laugh.png
    989 bytes · Vistos: 0
  • laugh.png
    laugh.png
    989 bytes · Vistos: 0
  • laugh.png
    laugh.png
    989 bytes · Vistos: 0
  • laugh.png
    laugh.png
    989 bytes · Vistos: 7
António Barbosa disse:
Para temperatura de óleo, acho os 80ºC muito baixo, mesmo os 90ºC...
A temperatura dos 80.ºC é a temperatura a que o óleo começa a passar pelo radiador a temperatura do óleo depois depende da eficiência do radiador, poderá ser 90.º ou 100.º dependendo da utilização do motor, o que o termostato garante é que se a temperatura estiver abaixo dos 80.ºc o óleo não é arrefecido...
 
A protecção de cárter:

003xx.JPG

A consola central para colocar o corte de corrente, a alavanca do extintor, e os botões do starter, bombas, ventoinha, etc:

001xx.JPG

002xx.JPG

AC928AAC-D9B9-4638-9B0A-C93428D020E2.JPG

E o carro está pronto para ser desmontado e ir para a pintura:

004xx.JPG
 

Anexos

  • 003xx.JPG
    003xx.JPG
    93.9 KB · Vistos: 0
  • 001xx.JPG
    001xx.JPG
    113.5 KB · Vistos: 0
  • 001xx.JPG
    001xx.JPG
    113.5 KB · Vistos: 0
  • 001xx.JPG
    001xx.JPG
    113.5 KB · Vistos: 0
  • 003xx.JPG
    003xx.JPG
    93.9 KB · Vistos: 7
  • 003xx.JPG
    003xx.JPG
    93.9 KB · Vistos: 0
  • 003xx.JPG
    003xx.JPG
    93.9 KB · Vistos: 0
  • 003xx.JPG
    003xx.JPG
    93.9 KB · Vistos: 0
  • 002xx.JPG
    002xx.JPG
    64 KB · Vistos: 0
  • 002xx.JPG
    002xx.JPG
    64 KB · Vistos: 0
  • 002xx.JPG
    002xx.JPG
    64 KB · Vistos: 0
  • 002xx.JPG
    002xx.JPG
    64 KB · Vistos: 0
  • 001xx.JPG
    001xx.JPG
    113.5 KB · Vistos: 0
  • 001xx.JPG
    001xx.JPG
    113.5 KB · Vistos: 7
  • 004xx.JPG
    004xx.JPG
    81.4 KB · Vistos: 7
  • 004xx.JPG
    004xx.JPG
    81.4 KB · Vistos: 0
  • 004xx.JPG
    004xx.JPG
    81.4 KB · Vistos: 0
  • 004xx.JPG
    004xx.JPG
    81.4 KB · Vistos: 0
  • 004xx.JPG
    004xx.JPG
    81.4 KB · Vistos: 0
  • AC928AAC-D9B9-4638-9B0A-C93428D020E2.JPG
    AC928AAC-D9B9-4638-9B0A-C93428D020E2.JPG
    69.2 KB · Vistos: 7
  • AC928AAC-D9B9-4638-9B0A-C93428D020E2.JPG
    AC928AAC-D9B9-4638-9B0A-C93428D020E2.JPG
    69.2 KB · Vistos: 0
  • AC928AAC-D9B9-4638-9B0A-C93428D020E2.JPG
    AC928AAC-D9B9-4638-9B0A-C93428D020E2.JPG
    69.2 KB · Vistos: 0
  • AC928AAC-D9B9-4638-9B0A-C93428D020E2.JPG
    AC928AAC-D9B9-4638-9B0A-C93428D020E2.JPG
    69.2 KB · Vistos: 0
  • AC928AAC-D9B9-4638-9B0A-C93428D020E2.JPG
    AC928AAC-D9B9-4638-9B0A-C93428D020E2.JPG
    69.2 KB · Vistos: 0
  • 002xx.JPG
    002xx.JPG
    64 KB · Vistos: 7
Fantastico trabalho João...já estou a imaginar o cortina pronto, muito bom parabens rolleyes.gif
 

Anexos

  • rolleyes.gif
    rolleyes.gif
    705 bytes · Vistos: 0
  • rolleyes.gif
    rolleyes.gif
    705 bytes · Vistos: 0
  • rolleyes.gif
    rolleyes.gif
    705 bytes · Vistos: 0
  • rolleyes.gif
    rolleyes.gif
    705 bytes · Vistos: 0
  • rolleyes.gif
    rolleyes.gif
    705 bytes · Vistos: 7
Mário Pio disse:
Fantastico trabalho João...já estou a imaginar o cortina pronto, muito bom parabens rolleyes.gif
Também eu nunca mais passa é do imaginar para o andar... laugh.png

António Barbosa disse:
Quem tem Meste Branco tem tudo, faz-se uma consola em metal como se fosse em cartolina...
É bem verdade... estão inúmeros detalhes no carro que não consigo mostrar e que fazem toda a diferença, um exemplo apenas todos os parafusos estão a apertar directamente à carroçaria sem necessidade de ter de apertar uma porca ou seja todas as porcas estão fixas à carroçaria para se montar e desmontar tudo de forma mais pratica.... ph34r.png


Frederico Jacob disse:
Vai ficar do aço este cortina wink.png
Do aço e do alumínio que não pode ficar com muito peso eh eh eh
 

Anexos

  • laugh.png
    laugh.png
    989 bytes · Vistos: 0
  • laugh.png
    laugh.png
    989 bytes · Vistos: 7
  • wink.png
    wink.png
    1 KB · Vistos: 0
  • ph34r.png
    ph34r.png
    878 bytes · Vistos: 0
  • ph34r.png
    ph34r.png
    878 bytes · Vistos: 0
  • ph34r.png
    ph34r.png
    878 bytes · Vistos: 0
  • wink.png
    wink.png
    1 KB · Vistos: 0
  • ph34r.png
    ph34r.png
    878 bytes · Vistos: 7
  • wink.png
    wink.png
    1 KB · Vistos: 0
  • wink.png
    wink.png
    1 KB · Vistos: 0
  • wink.png
    wink.png
    1 KB · Vistos: 7
  • laugh.png
    laugh.png
    989 bytes · Vistos: 0
  • ph34r.png
    ph34r.png
    878 bytes · Vistos: 0
  • rolleyes.gif
    rolleyes.gif
    705 bytes · Vistos: 0
  • rolleyes.gif
    rolleyes.gif
    705 bytes · Vistos: 0
  • laugh.png
    laugh.png
    989 bytes · Vistos: 0
  • rolleyes.gif
    rolleyes.gif
    705 bytes · Vistos: 0
  • rolleyes.gif
    rolleyes.gif
    705 bytes · Vistos: 0
  • rolleyes.gif
    rolleyes.gif
    705 bytes · Vistos: 7
  • laugh.png
    laugh.png
    989 bytes · Vistos: 0
O Mestre Branco acabou as soldas do carro e os reforços na carroçaria:

001rrrrr.JPG

002rrrrrrrrrrrrrr.JPG

O novo suporte dos copos do óleo para os travões e embraiagem:

003rrrrrrrrrrrr.JPG

004rrrrrrrrrrr.JPG

E está quase preparado para ir para a pintura...
 

Anexos

  • 002rrrrrrrrrrrrrr.JPG
    002rrrrrrrrrrrrrr.JPG
    90.7 KB · Vistos: 7
  • 002rrrrrrrrrrrrrr.JPG
    002rrrrrrrrrrrrrr.JPG
    90.7 KB · Vistos: 0
  • 002rrrrrrrrrrrrrr.JPG
    002rrrrrrrrrrrrrr.JPG
    90.7 KB · Vistos: 0
  • 002rrrrrrrrrrrrrr.JPG
    002rrrrrrrrrrrrrr.JPG
    90.7 KB · Vistos: 0
  • 002rrrrrrrrrrrrrr.JPG
    002rrrrrrrrrrrrrr.JPG
    90.7 KB · Vistos: 0
  • 001rrrrr.JPG
    001rrrrr.JPG
    83.2 KB · Vistos: 0
  • 001rrrrr.JPG
    001rrrrr.JPG
    83.2 KB · Vistos: 0
  • 001rrrrr.JPG
    001rrrrr.JPG
    83.2 KB · Vistos: 0
  • 001rrrrr.JPG
    001rrrrr.JPG
    83.2 KB · Vistos: 0
  • 001rrrrr.JPG
    001rrrrr.JPG
    83.2 KB · Vistos: 7
  • 004rrrrrrrrrrr.JPG
    004rrrrrrrrrrr.JPG
    74.8 KB · Vistos: 0
  • 004rrrrrrrrrrr.JPG
    004rrrrrrrrrrr.JPG
    74.8 KB · Vistos: 0
  • 004rrrrrrrrrrr.JPG
    004rrrrrrrrrrr.JPG
    74.8 KB · Vistos: 0
  • 004rrrrrrrrrrr.JPG
    004rrrrrrrrrrr.JPG
    74.8 KB · Vistos: 0
  • 003rrrrrrrrrrrr.JPG
    003rrrrrrrrrrrr.JPG
    71.2 KB · Vistos: 0
  • 003rrrrrrrrrrrr.JPG
    003rrrrrrrrrrrr.JPG
    71.2 KB · Vistos: 7
  • 003rrrrrrrrrrrr.JPG
    003rrrrrrrrrrrr.JPG
    71.2 KB · Vistos: 0
  • 003rrrrrrrrrrrr.JPG
    003rrrrrrrrrrrr.JPG
    71.2 KB · Vistos: 0
  • 003rrrrrrrrrrrr.JPG
    003rrrrrrrrrrrr.JPG
    71.2 KB · Vistos: 0
  • 004rrrrrrrrrrr.JPG
    004rrrrrrrrrrr.JPG
    74.8 KB · Vistos: 7
Voltar
Topo